Menu
Call this Wednesday to Get $35 OFF
Licensed & Certified Electricians in Denver, CO
Call this Wednesday to Get
$35 OFFNeed an Electirician?
SCHEDULE SERVICE NOW!
Call this Wednesday to Get $35 OFF
Call this Wednesday to Get
$35 OFFSCHEDULE SERVICE NOW!

The electrical outlets in your home play a vital role in connecting appliances to the grid. Over time, you may notice burnt, damaged, or overheating outlets, prompting the expertise of a professional electrician in Aurora, CO. Unfortunately, most homeowners ignore minor signs of deterioration until things get out of hand. Don’t wait for severe electrical hazards to happen, call Mr. Electric to inspect and fix underlying electrical issues quickly. If you prefer a more hands-on approach to electrical repair projects, here’s a step-by-step guide to ensure a seamless and successful process.
Safety is crucial when undertaking electrical projects. Turn off the power to that specific fixture or the entire building to prevent electrocution, fire hazards, costly property damage, and fatalities. In addition, turning off the power gives you peace of mind knowing you are protected, so that you can focus on the repairs at hand. If you can’t locate the breaker box or the main panel, call a skilled electrician to handle repairs.
Once you turn off the power, use a voltage tester to ensure there’s no live current flowing through the outlet. If you detect current, the power is not off, and you may have switched the wrong outlet at the breaker box. In such cases, locate the main panel and turn off the power to your entire home. This prevents uncertainties and subsequent safety hazards.
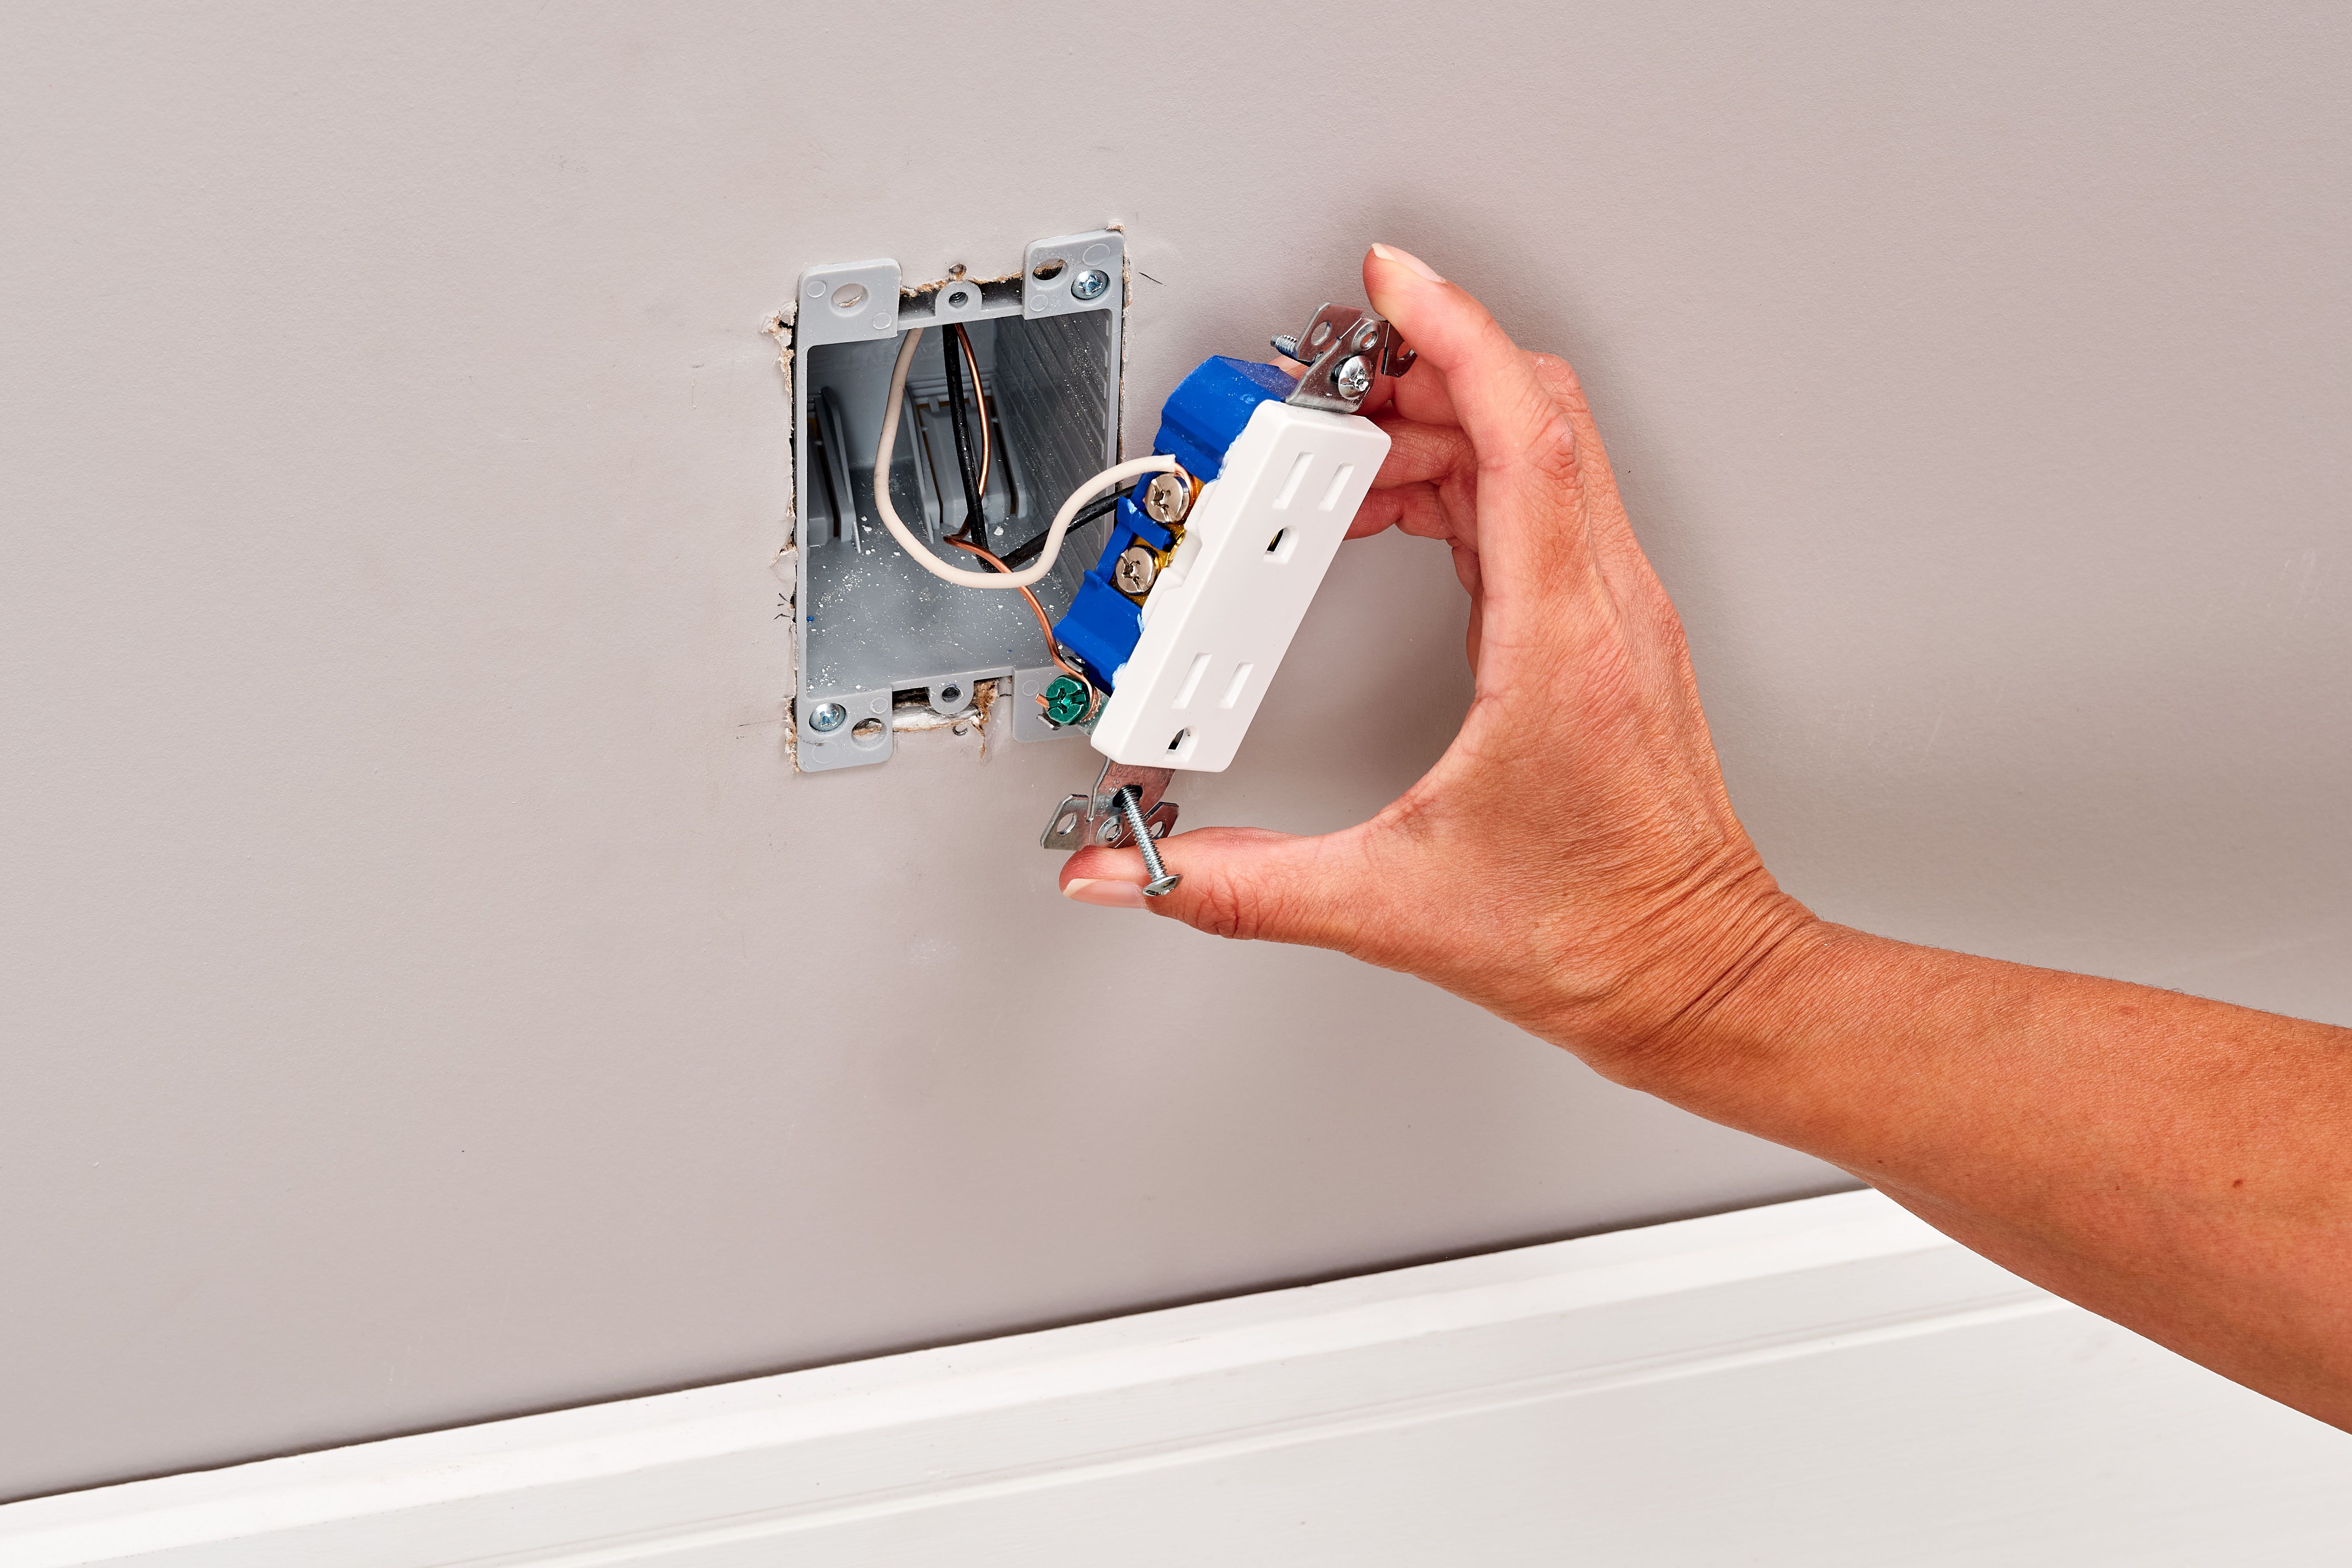
The next step is the actual outlet replacement. Use a screwdriver, preferably a flathead screwdriver to remove the faceplate so that you can access the outlet receptacle. If the faceplate is dusty or damaged, clean and repair it to prevent issues in the future. You can also replace the entire faceplate for peace of mind, especially if you have children or pets.
It is crucial to note that an electrical outlet replacement is complex and requires extensive expertise to execute safely and successfully. If you prefer a DIY approach, remove the receptacle safely by unscrewing the top and bottom. After removing the screws, lift it out for a better look at the internal components. This will help you to determine whether a complete replacement is necessary. Some noticeable signs you need a new outlet include cracking, chipping, and looseness.
Electrical outlets usually have three wires: white, black, and green. Sometimes, you may notice a bare copper wire in old electrical systems. White wires are neutral, black wires carry the voltage, and green or copper wires ground the system. It is advisable for DIYers to record a video as they undo the wiring, preventing errors when installing the new outlet. In addition, look out for damaged wiring and snip it using cutters so that you can use newer cables for your new fixture.
Connect the new receptacle carefully with the help of your video to avoid errors and electrical hazards. Secure the fixture using screws or wiring before reinstalling the faceplate. Turn on the power and plug in a device to test it and check for signs of improper placement, such as overheating, sparks, or lack of power. If you notice these issues after installing a new outlet, hire a reputable electrical service to reinstall and repair any damaged components.
Now that you know the steps to replace an electrical outlet, you can navigate the process seamlessly and safely. If you don’t have the experience or knowledge required to handle electrical repair or replacement projects, contact Mr. Electric to do the heavy lifting. We leverage extensive expertise to address all your electrical needs effectively, restoring functionality and efficiency to your home.

Did the lights cut out without warning?…
Do your lights blink when the microwave…
We use electricity daily—turning on lights, charging phones, or using…
Electrical projects pose significant safety risks and should be left…